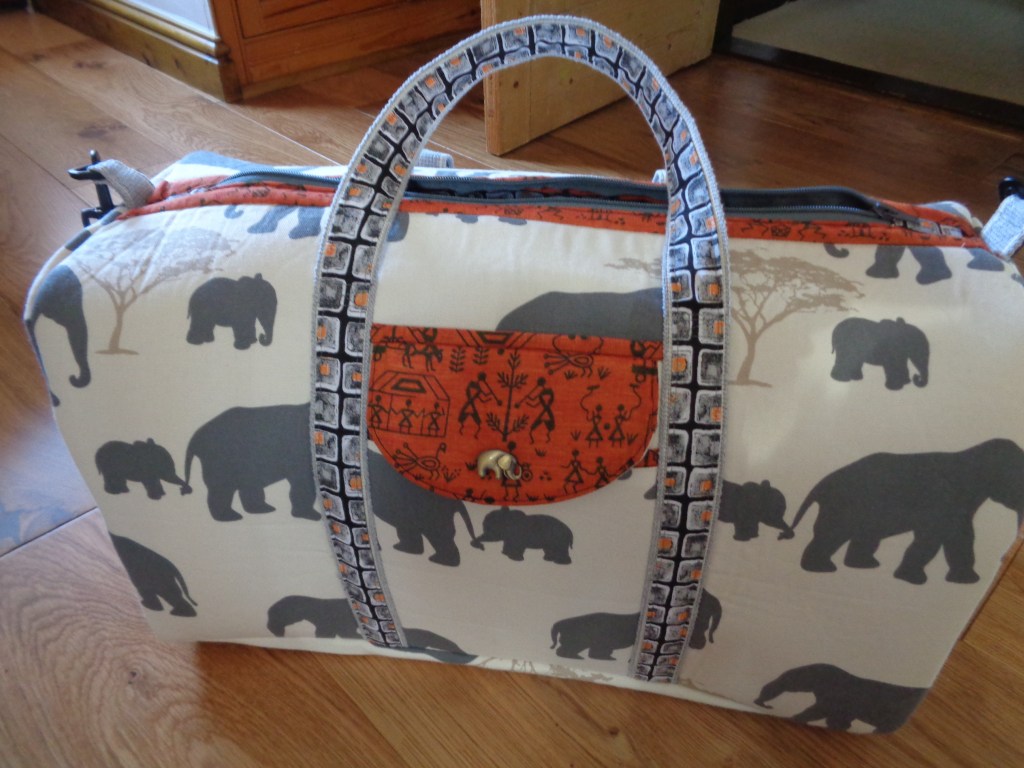
I last posted a photo of all the pieces needed to make up the Long Week End Bag designed by Touch My Heart Designs. I am very please with the way  my version has turned out, but I thought I should add a note of warning. I found it impossible to one, match the top seams so as to make the zip opening central, and two, once the opening was made make the seam neat enough to sew smoothly.


To get a better outcome and make it easy with no corners to sew, I resorted to binding the zip edge, and sewing the tabs on each end of the zip as instructed in the the pattern. But then instead of them lying inside I made them the zip extension and treated the tabs like the zip.


The only thing to remember is that the outside and the lining of this bag are made separately, so do not sew the zip or the strip right to the end. When you come to join the end panels to the lining and outer you will have to fiddle a bit to make sure you can sew each end panel in individually. It was impossible to photograph this clearly I am afraid, but you should be able to follow if you think it through. You want the outer and lining only to be joined by the zip as described in the original instructions.
I found it easiest to start sewing the side panels from the top and down each side.


My only other amendment was to make the shoulder tabs from the webbing off cuts, if you have any of course. It just saved time making up fabric ones and is just as strong and professional looking.
I enjoyed this sewing experience, but it was one of those that you HAD to finish quickly or you could get disheartened, now I just want to use my new bag. I hope my solution has helped others!


Leave a comment